August 4, 2024
How to use Auth0 as backoffice authentication provider in Umbraco 12
The original Umbraco 12 field note on using Auth0 as a backoffice authentication provider.
Sometimes, it is convenient to use an external identity provider to create a SSO for our applications.
In my case, I am using Auth0 (which is free for personal use) on my various personal home management applications, and I started to find annoying having to put specific credentials in my Umbraco backoffice in order to manage my website.
So, I started looking for a way to integrate Auth0 also there.
Umbraco documentation offers instructions for other providers, such as Google, Facebook, Twitter and also a generic Open ID connector.
Starting from those examples, putting together the code to integrate Auth0 was quite simple, so I thought it would be nice to share it here.
Auth0 Application
First of all, you will need to have an Auth0 account. You can create it for free here: https://auth0.com/signup
Once the account is set and working, all you need to do is got to Applications -> Applications in the sidebar and click on “Create Application”
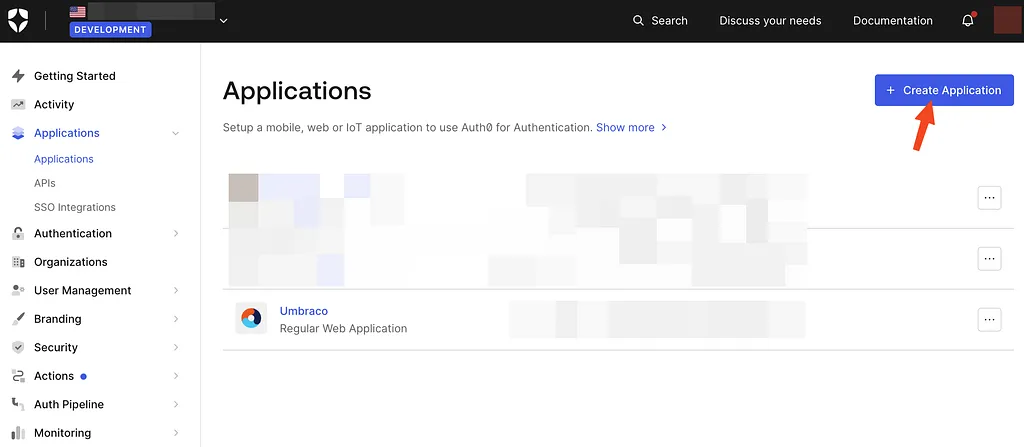
Just choose “Regular Web Application”, type a name for yout application and proceed. That’s basically it.
You will end up in the application page, where you need to click on the “Settings” tab in order to retrieve the data we need:
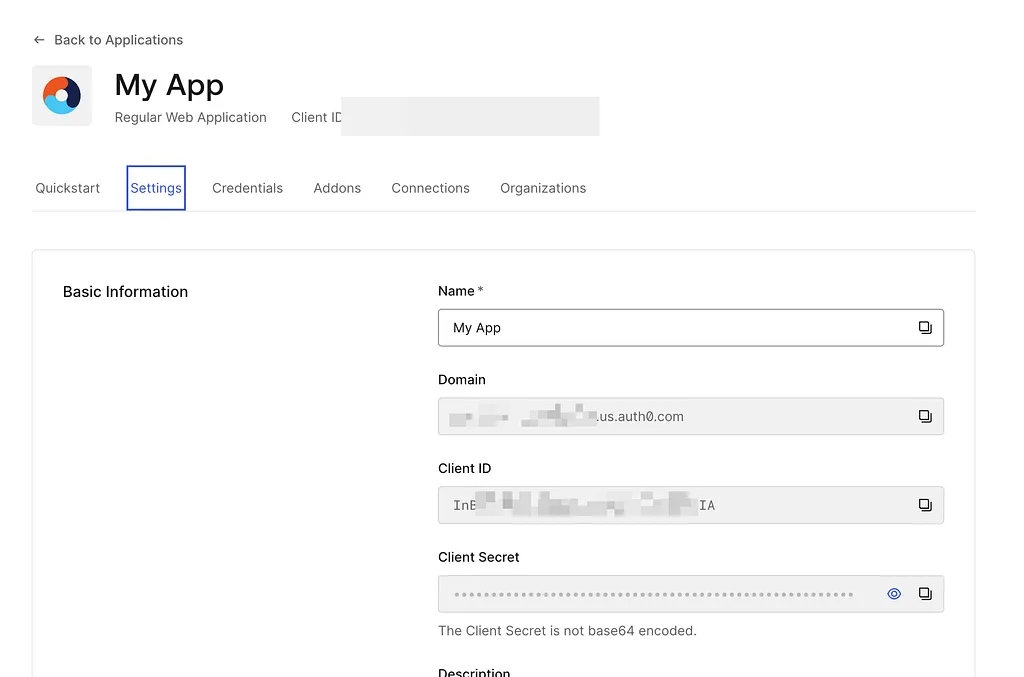
Please take note of Domain, Client ID and Client Secret, we will need them in a minute!
One last thing before heading to Umbraco: we need to set the callback urls for our authentication.
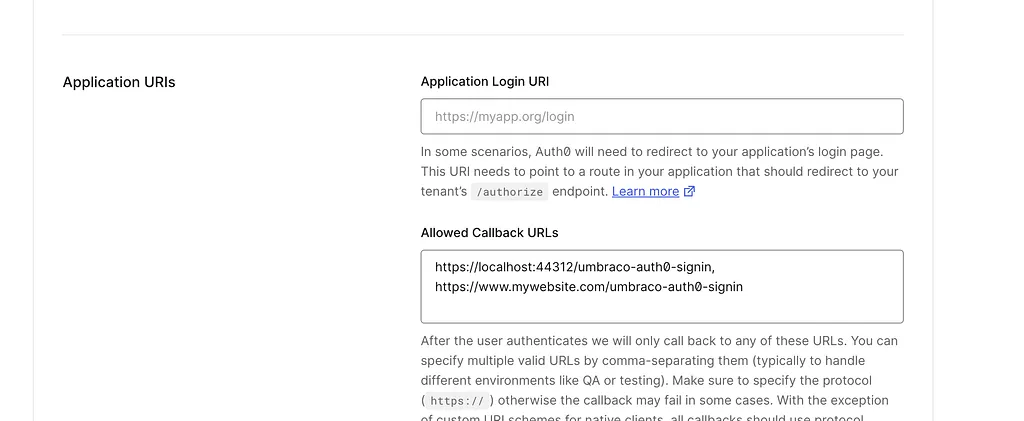
As we will see, Umbraco will use the /umbraco-auth0-signin path for our authentication provider (but you can change it if you want), so here we need to put our website url + that path. I added also the localhost url in order to be able to use it also during the development sessions. The port could differ on your project.
How to manage users on Auth0
Without entering into too many details, the easiest way to manage users is through the User Management -> Users menu item.
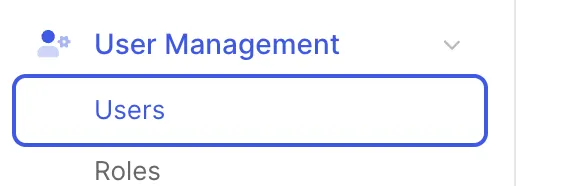
All users created here will have access to our application. You can refer to the Auth0 documentation in order to learn how to add limitations to users. For our simple case, we’re ok with that.
Umbraco integration
We can now proceed with the Umbraco part. First of all, most of the heavy lifting will rely on the official Nuget Package for Auth0:
Auth0.AspNetCore.Authentication 1.4.1
You need to add it to your installation via your GUI or nuget command
dotnet add package Auth0.AspNetCore.Authentication -version 1.4.1Now that we have it installed, we can proceed and create a folder inside our project, called “ExternalUserLogin”.
The first file we will add to this folder is called “Auth0BackOfficeExternalLoginProviderOptions.cs” and contains the class
using Microsoft.Extensions.Options;
using Umbraco.Cms.Core;
using Umbraco.Cms.Web.BackOffice.Security;

namespace Umbraco.ExternalUserLogin;

public class Auth0BackOfficeExternalLoginProviderOptions : IConfigureNamedOptions
{
    public const string SchemeName = "OpenIdConnect";

    public void Configure(string? name, BackOfficeExternalLoginProviderOptions options)
    {
        ArgumentNullException.ThrowIfNull(name);

        if (name != Constants.Security.BackOfficeExternalAuthenticationTypePrefix + SchemeName) return;

        Configure(options);
    }

    public void Configure(BackOfficeExternalLoginProviderOptions options)
    {
        // Customize the login button
        options.ButtonStyle = "btn-inverse";
        options.Icon = "icon-lock";

        // The following options are only relevant if you
        // want to configure auto-linking on the authentication.
        options.AutoLinkOptions = new ExternalSignInAutoLinkOptions(
            // Set to true to enable auto-linking
            true,

            // [OPTIONAL]
            // Default: "Editor"
            // Specify User Group.
            new[] { Constants.Security.EditorGroupAlias }
        )
        {
            // [OPTIONAL] Callback
            OnAutoLinking = (autoLinkUser, loginInfo) =>
            {
                // Customize the user before it's linked.
                // Modify the User's groups based on the Claims returned
                // in the external ogin info.
            },
            OnExternalLogin = (user, loginInfo) =>
            {
                // Customize the User before it is saved whenever they have
                // logged in with the external provider.
                // Sync the Users name based on the Claims returned
                // in the external login info

                // Returns a boolean indicating if sign-in should continue or not.
                return true;
            }
        };

        // [OPTIONAL]
        // Disable the ability for users to login with a username/password.
        // If set to true, it will disable username/password login
        // even if there are other external login providers installed.
        options.DenyLocalLogin = false;

        // [OPTIONAL]
        // Choose to automatically redirect to the external login provider
        // effectively removing the login button.
        options.AutoRedirectLoginToExternalProvider = false;
    }
}
This is a configuration class, and it is basically the same as “ProviderBackOfficeExternalLoginProviderOptions” found in the generic Open ID implementation in the official documentation here: https://docs.umbraco.com/umbraco-cms/v/12.latest/reference/security/external-login-providers
The second file is going to be “Auth0AuthenticationExtensions.cs”, which will help us isolate the setup for our authentication that we’re going to use in the Startup class. Here’s its content:
using Auth0.AspNetCore.Authentication;

namespace Umbraco.ExternalUserLogin;

public static class Auth0AuthenticationExtensions
{
    public static IUmbracoBuilder AddAuth0Authentication(this IUmbracoBuilder builder)
    {
        builder.Services.ConfigureOptions();

        builder.AddBackOfficeExternalLogins(logins =>
        {
            logins.AddBackOfficeLogin(
                backOfficeAuthenticationBuilder =>
                {
                    var schemeName =
                        backOfficeAuthenticationBuilder.SchemeForBackOffice(Auth0BackOfficeExternalLoginProviderOptions
                            .SchemeName);

                    ArgumentNullException.ThrowIfNull(schemeName);

                    backOfficeAuthenticationBuilder.AddAuth0WebAppAuthentication(
                        schemeName,
                        options =>
                        {
                            options.Domain = "[DOMAIN]";
                            options.CallbackPath = "/umbraco-auth0-signin";
                            options.ClientId = "[CLIENT ID]";
                            options.ClientSecret = "[CLIENT SECRET]";
                            options.Scope = "openid email";
                        });
                }, providerOptions =>
                {
                    providerOptions.DenyLocalLogin = true;
                    providerOptions.AutoRedirectLoginToExternalProvider = true;
                });
        });
        return builder;
    }
}
Here you need to replace the placeholders between brackets with your values from your Auth0 application.
There are a couple of noticeable configurations here:
- DenyLocalLogin means that we will no longer be able to use our “local” Umbraco users to log into our backoffice. In my case I was fine with that, you may still want to be able to choose (maybe some users will log in throught Auth0 and other won’t)
- AutoRedirectLoginToExternalProvider means that the user will not see the “login screen” in Umbraco and, instead, will be directly sent to Auth0 to authenticate
As you see, the CallbackPath here is the same we put in Auth0.
Now that it’s all set, we can put the final touch. Head to your Startup.cs file and just attach our Auth0 extension to the Umbraco builder.
var umbracoBuilder = services.AddUmbraco(_env, _config)
            .AddBackOffice()
            .AddWebsite()
            .AddDeliveryApi()
            .AddComposers()
            .AddAuth0Authentication();
That’s it, run your application and you should be able to log into your backoffice through your Auth0 user!
Known limitations
This code has been used and tested on Umbraco 12. The current version as the time of writing, Umbraco 14, has a slightly different code for the authentication and so my solution would not apply.
If you want to integrate Auth0 in your newer version of Umbraco, the best way is to start from the official documentation and navigate your way from there. The Umbraco 12 reference page used by this article is External login providers for Umbraco 12. For the current Umbraco documentation, start from External Login Providers.